In weather-related emergencies, local officials oftentimes designate several sandbag-filling stations throughout the community. Those who take advantage of these free sandbags don’t always understand how to properly fill or use them, so we’re here to help.
Here are the answers to some common questions around proper sandbag use. First, let’s take a quick look at the sandbags themselves.
What Are Sandbags Made of?
Most sandbags are made from either burlap, polypropylene, or other sturdy materials. They are designed to hold tightly packed sand or similar aggregate. It is not recommended that these types of sandbags be filled with materials that could damage them, like sharp mulch or rocks.
One type of sandbag that is becoming more and more popular is the sandless sandbag. The outer shell construction of sandless sandbags varies by manufacturer, as does what’s inside the bag. For example, our own Ultra-Aqua Bag is made from hydrophilic, non-woven fabric, while the inside is a super-absorbent patented polymer that expands upon contact with water.
How Do I Fill Sandbags?
Fill sandbags 1/2 to 2/3 full. A properly filled sandbag should weigh between 35-40 lbs. Overfilled sandbags and sandbags that are tied too low leave gaps in the levee, allowing water to seep through. Overfilled sandbags weigh around 70-75 lbs.
The easiest way to fill a sandbag is to have one person hold it open, as another person shovels the sand into the bag. To fill a sandbag alone, it is best to rake the sand into the bag. There are also special stands designed to hold the sandbag for you as you fill it. Some emergency sandbag filling stations may have these stands or volunteers available to help you.
TIP: When filling and stacking sandbags, be sure to use proper lifting techniques. Lift with your knees, not your back.
If your sandbags have integrated ties, you don’t need to use them. This is especially true if you’re in a hurry, or you’re part of a sandbag assembly line. On the other hand, ties are useful when you need to store or transport the bags.
When not using the sandbag ties, simply fold the top of the bag over, leaving some room between the fold and the sand, before you drop it into place (more on laying sandbags below).
Do I Have to Use Sand in my Sandbags?
Sandbags are strongest when filled with either clean sand or soil. While you can use yard dirt in a pinch, it’s not ideal if it also contains debris that could puncture the bag—small roots, rocks, etc. If a sandbag filled with dirt is punctured, water could penetrate the bag. Wet dirt then becomes mud and could negatively impact the integrity of the wall.
How Many Sandbags Do I Need?
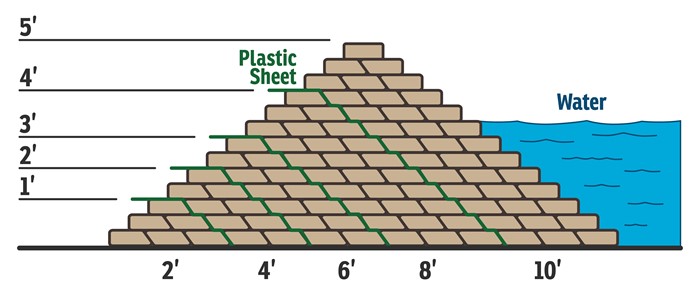
The U.S. Army Corps of Engineers recommends building a dike with a width at the base that is three times the dike height. For example, a 4-foot-high dike would have a base width of 12 feet.
Sandbags vary in size but there are some common calculations across various emergency management agencies when constructing a 100-foot wall that is 2-3 sandbags wide using standard 14” x 26’ sandbags.

Where Should I Place My Sandbags?
When protecting closed doors and windows, sandbags are most effective when placed directly in front of and against the bottom of the door or window, stacked as high as necessary. This creates a tight seal to stop water from seeping through the bottom of the doors and windows.
If you need to protect a larger area—a home’s perimeter or yard, for example—the placement of the sandbag dike can vary greatly, as well as its height. Remember that sandbag walls will deteriorate over time. If you build a perimeter dike where you know for certain water will end up, the sandbags will be soaking in that water. Build the wall as far in as you are willing to have floodwaters reach.
You can actually use sandbags inside your home, too. If you’re on a septic system, for example, placing sandbags over drains can stop contaminated water from entering the home. This is where our own Ultra-Aqua Bags sandless sandbags are very handy to have.
What is the Proper Way to Stack Sandbags?
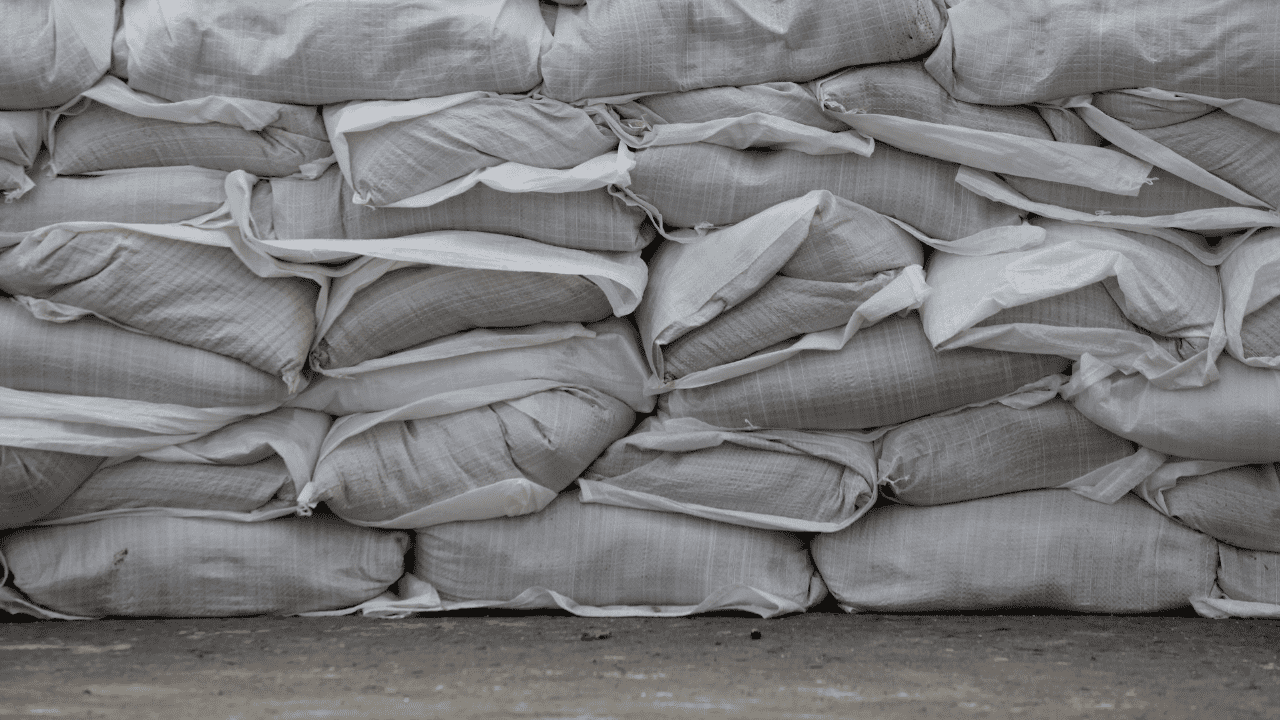
When stacking sandbags, the first row should form a tight seal with the ground. The bags should be placed end-to-end, slightly overlapping one another. Subsequent rows should be staggered so there are no continuous joints.
When placing the sandbags onto the dike itself, you’ll want to hold the bag above the area and thrust the bag into place. The idea is to let gravity do its job but with a bit of help. Then, use your foot to help tamp the sandbag into place. The folded or tied edges of the sandbags should be facing the direction of water flow.
If you’re building a barrier more than a few feet high, a single-stack wall will likely topple over. For taller barriers, you should dig a bonding trench where the dike will be placed. The trench should be about 4 to 6 inches deep and 18 to 24 inches wide.
Place the sandbags in a pyramid with the bottom layer being two-to-three times the width of the top layer, as noted above per theU.S. Army Corps of Engineers.

Finished dikes should be sealed with plastic sheeting to prevent water penetration. Spread a layer of soil or sand one-inch deep and about one-foot wide along the bottom of the dike on the water side. Lay the plastic sheeting so the bottom extends one-foot beyond the bottom edge of the dike over the loose soil or sand. The upper edge of plastic should extend over the top of the dike.
Place a row of sandbags on the bottom edge of the plastic to form a watertight seal along the water side. Place sandbags to hold down the top edge of the plastic. Avoid puncturing the plastic with sharp objects or by walking on it.
On the water side of larger dikes, you can use a sump or skimmer pump to remove any water that penetrates the wall. You can also use a few partially buried five-gallon buckets with holes drilled in the side of them as a sump system to collect water seepage.


